Hey folks, I am Rohan Kumar Pre-final year student at Maharaja Surajmal Institute of Technology pursuing Information Technology. I am Beginner in the Web3 world but a quick learner. So, in this article, I will guide you on how to create your own Ethereum Token in just 30-45 min.
Section-1
What is Ethereum?
Ethereum is a decentralized blockchain platform that creates a peer-to-peer network for safely executing and validating smart contract application code. Participants can do business with one another using smart contracts without the need for a reliable central authority.
The thing which makes Ethereum Safest Network is its massive community because in the community there are a higher number of validators and making it hard to plan an attack on this network. All working to make the network as safe as they can. So, Community plays important role in Web3 World.
Section 2 (Prerequisites)
we will learn about.
How to create an ERC20 token like Shiba Inu, Safemoon, Aave, etc
How to use the OpenZeppelin library.
How to use QuickNode to create your dApp
How to deploy on Ethereum Testnet.
ERC20
The ERC-20 introduces a standard for Fungible Tokens, in other words, they have a property that makes each Token exactly the same (in type and value) as another Token. For example, an ERC-20 Token acts just like the ETH, meaning that 1 Token is and will always be equal to all the other Tokens.
Things required to make your token super ready.
Remix IDE - to write and deploy our code
OpenZeppelin - Ethereum Network supports EVM so we will use ERC-20 standards
MetaMask - to interact with the Ethereum Network
Quick Node - to interact with Ethereum Testnet (also called Ethereum Goerli)
Some ETH tokens - which we can get from the faucet. (http://goerlifaucet.com/).
Section 3 (Setting up the environment)
QuickNode is a Web3 developer platform used by teams big & small to build and scale blockchain applications. Access Ethereum, Bitcoin, BSC, Polygon, and xDai networks in seconds, and get tools to ship the best version of your dapp. (QuickNode)
First, we need to set up QuickNode with Ethereum Testnet nodes.
Create an account on Quicknode Sign in/ Sign up.
Once your account is created you will see a page appear ( your account successfully created ready to create an endpoint).
Click on create an endpoint.
Select Ethereum as an endpoint.
Select Goerli as a chain and click on continue.
I hope now your endpoint is created if you follow all the steps.
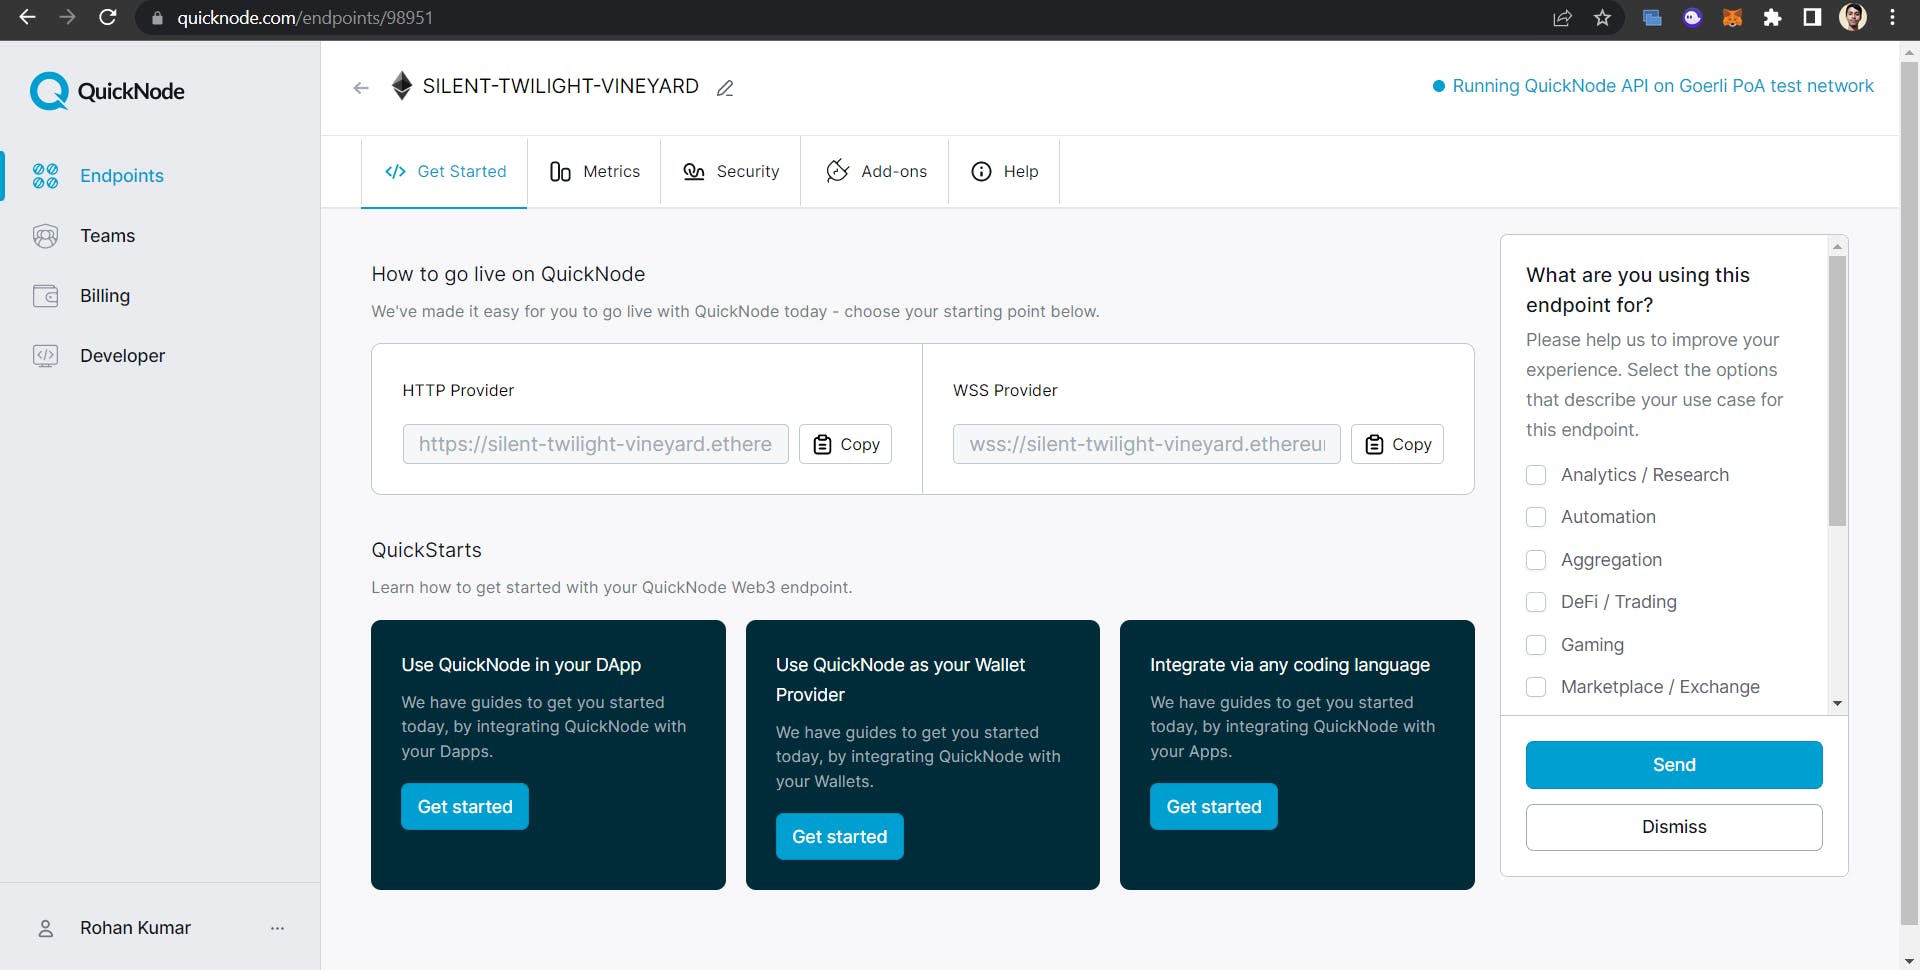
This is how the page look's after the endpoint creation.
The next step is setting up the MetaMask wallet with QuickNode.
Click on the MetaMask wallet pinned to your tab.
Click on the list of the network (top middle-rounded shape).
it will all the networks that you have used so far and created so in our case we have to create the network. Click on Add Network.
A new form is arrived by MetaMask to add new network.(Network Name, RPC URL, CHAIN ID, Currency symbol).
Paste the HTTPS in New RPC URL field with 5 as Chain ID, “ETH” as Currency Symbol, Ethereum Goerli as Network Name (any name as you like) and finally https://goerli.etherscan.io/ as Block Explorer URL. Click Save.
Now MetaMask is set up for our token.
Let's get some FREE ETH now 🤑🤑🤑🤑
Since we are on testnet, we can go to the faucet and get some free ETH.
Now go to http://goerlifaucet.com/
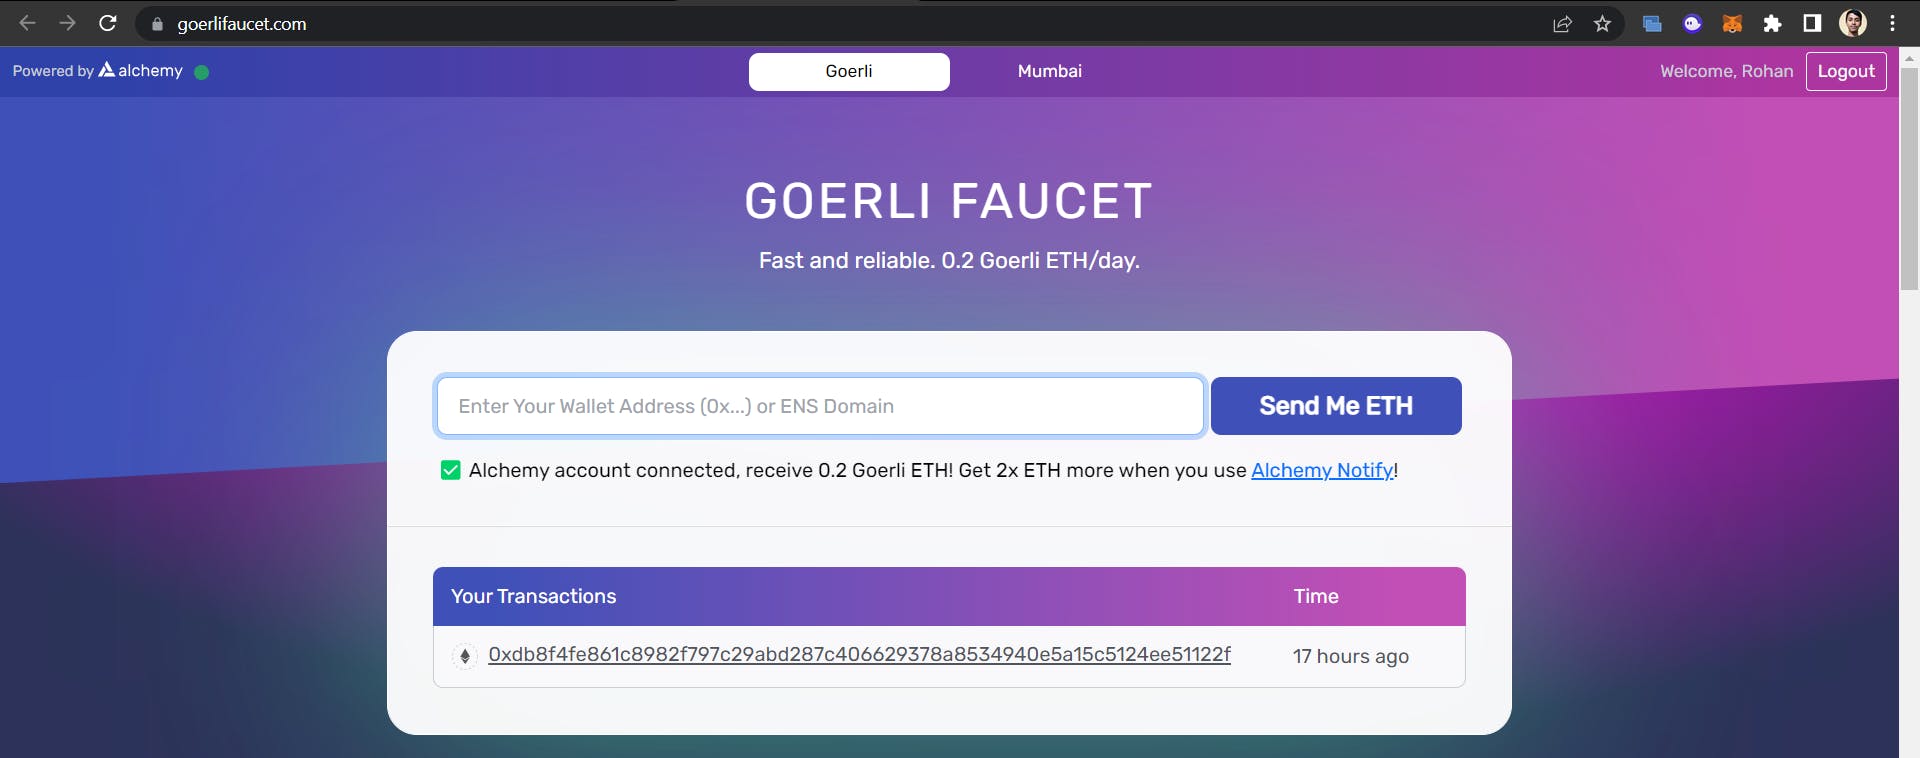
Sign in with Alchemy account and paste your Goerli Ethereum MetaMAsk address to receive your free ETH.
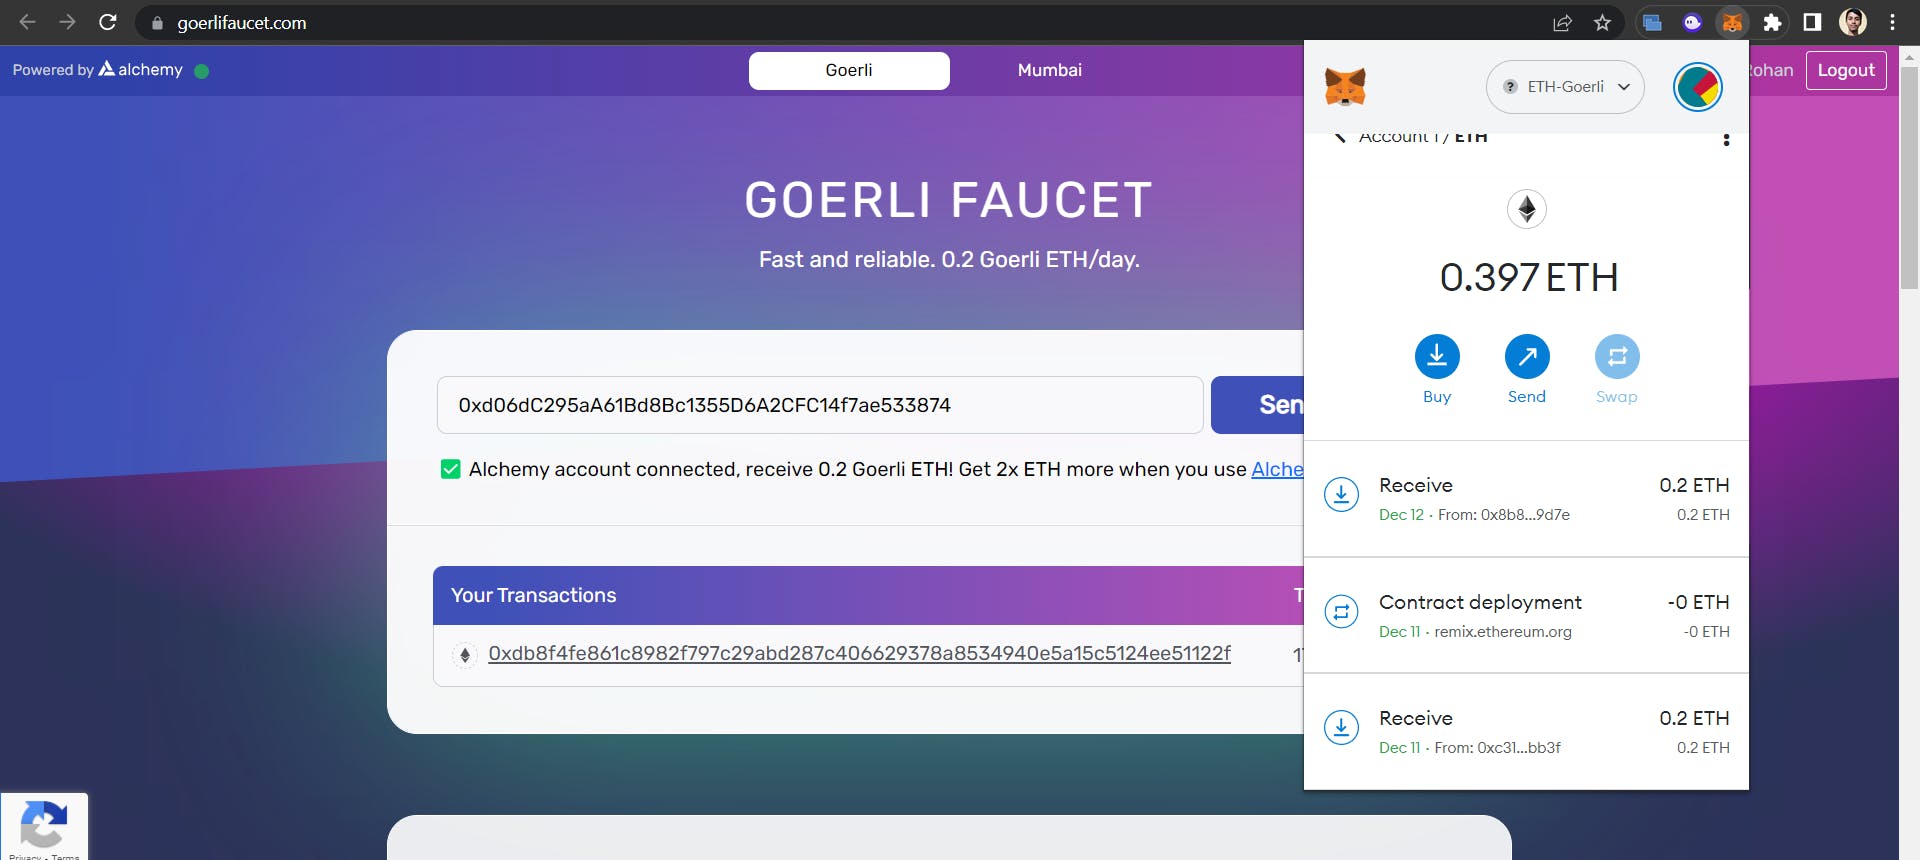
And voila, you will have some ETH tokens in your account to pay for the transaction fees. (0.2 ETH recived).
Section 4(Coding)

So, here is intresting section, but it will only takes few minutes. to write a basic smart contract.(only 6 lines of code).
Head over to REMIX IDE or Online IDE (http://remix.ethereum.org/).
Simply create a new file name as MyToken.sol
MyToken will contain the code and the OpenZeppelin library will be used to write our smart contract
Now, file is created open the file and paste the below code in your editor.
Do, some minor change( change your coin name and cuurency). In mine case my coin name is Kiroshek.
// SPDX-License-Identifier: GPL-3.0
pragma solidity >=0.7.0 <0.9.0;
import "@openzeppelin/contracts/token/ERC20/ERC20.sol";
contract MyToken is ERC20 {
constructor () ERC20("Kiroshek Coin", "Kiroshek") {
_mint(msg.sender, 1000000 * 10 ** decimals());
}
}
Section 5(Deployment 🔨)
So, here comes final part just few minutes more to go final lap.

So, head over to the remix ide where you created MyToken file. it is time to compile our file (testing time).
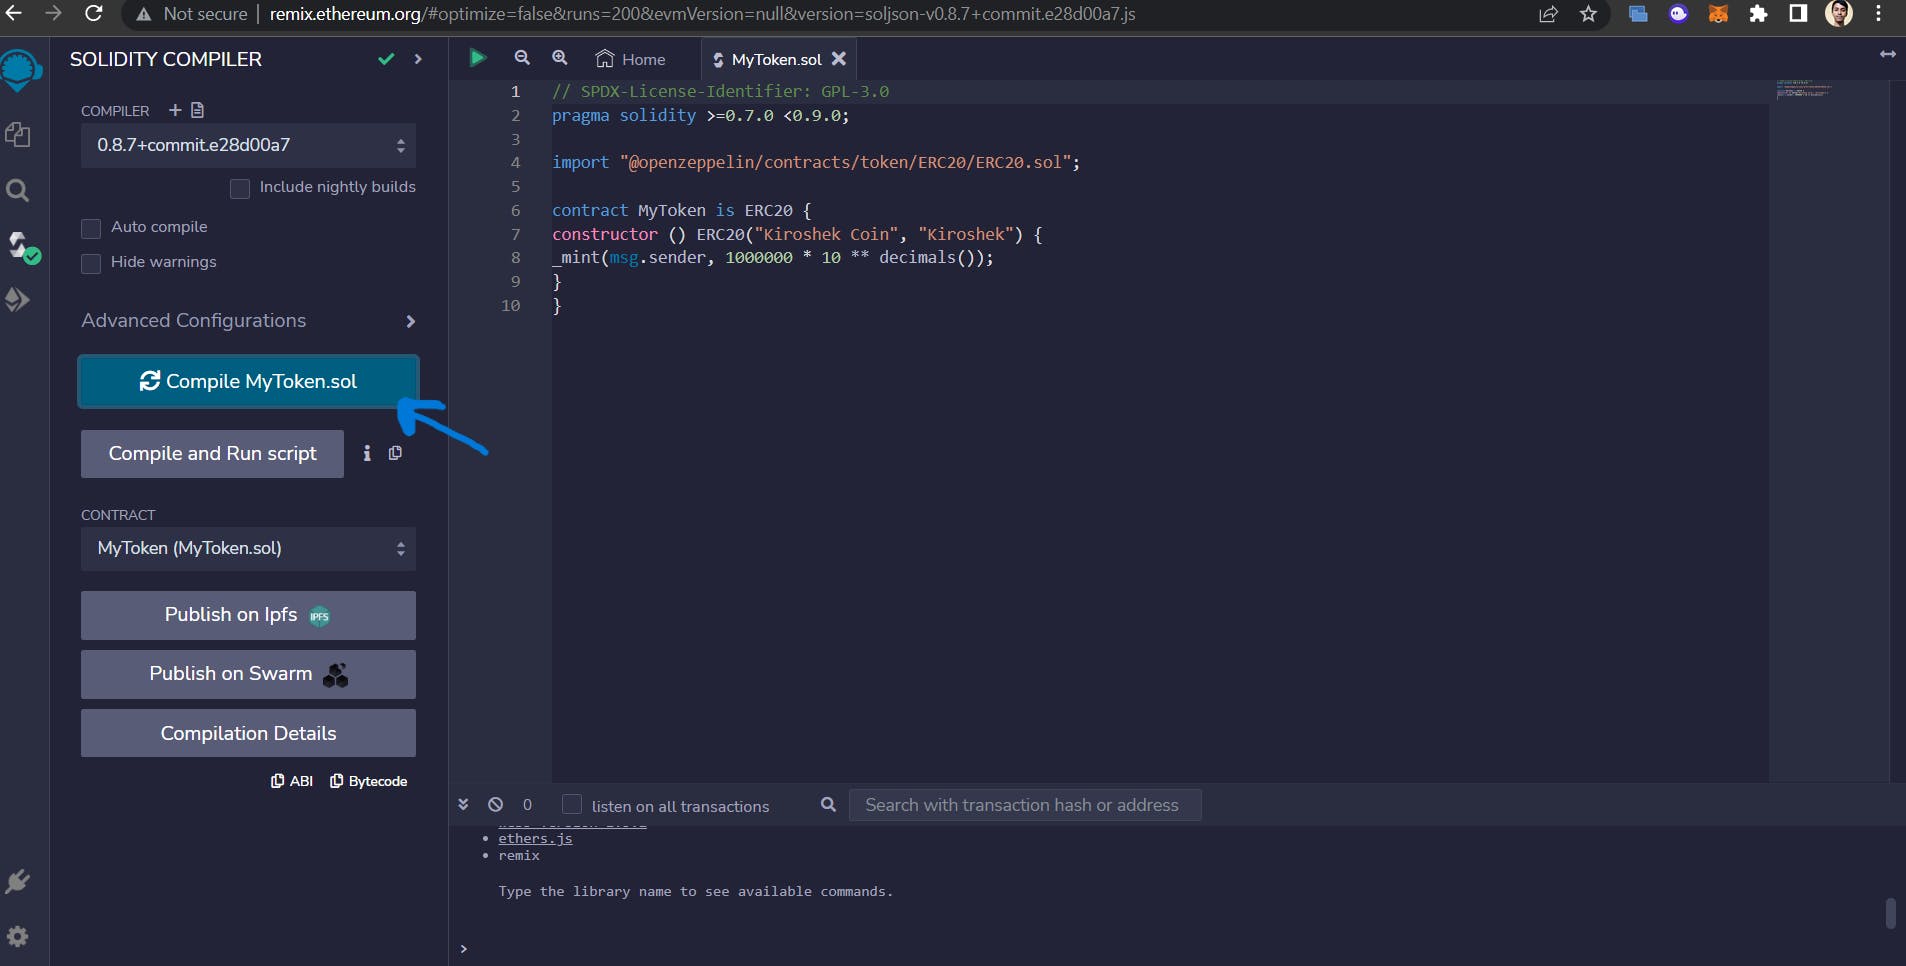
After the compilation is done, Click on deploy section just below compilation section in side bar. select Injected Provider as Environment and leave everything as same in the deploy section.
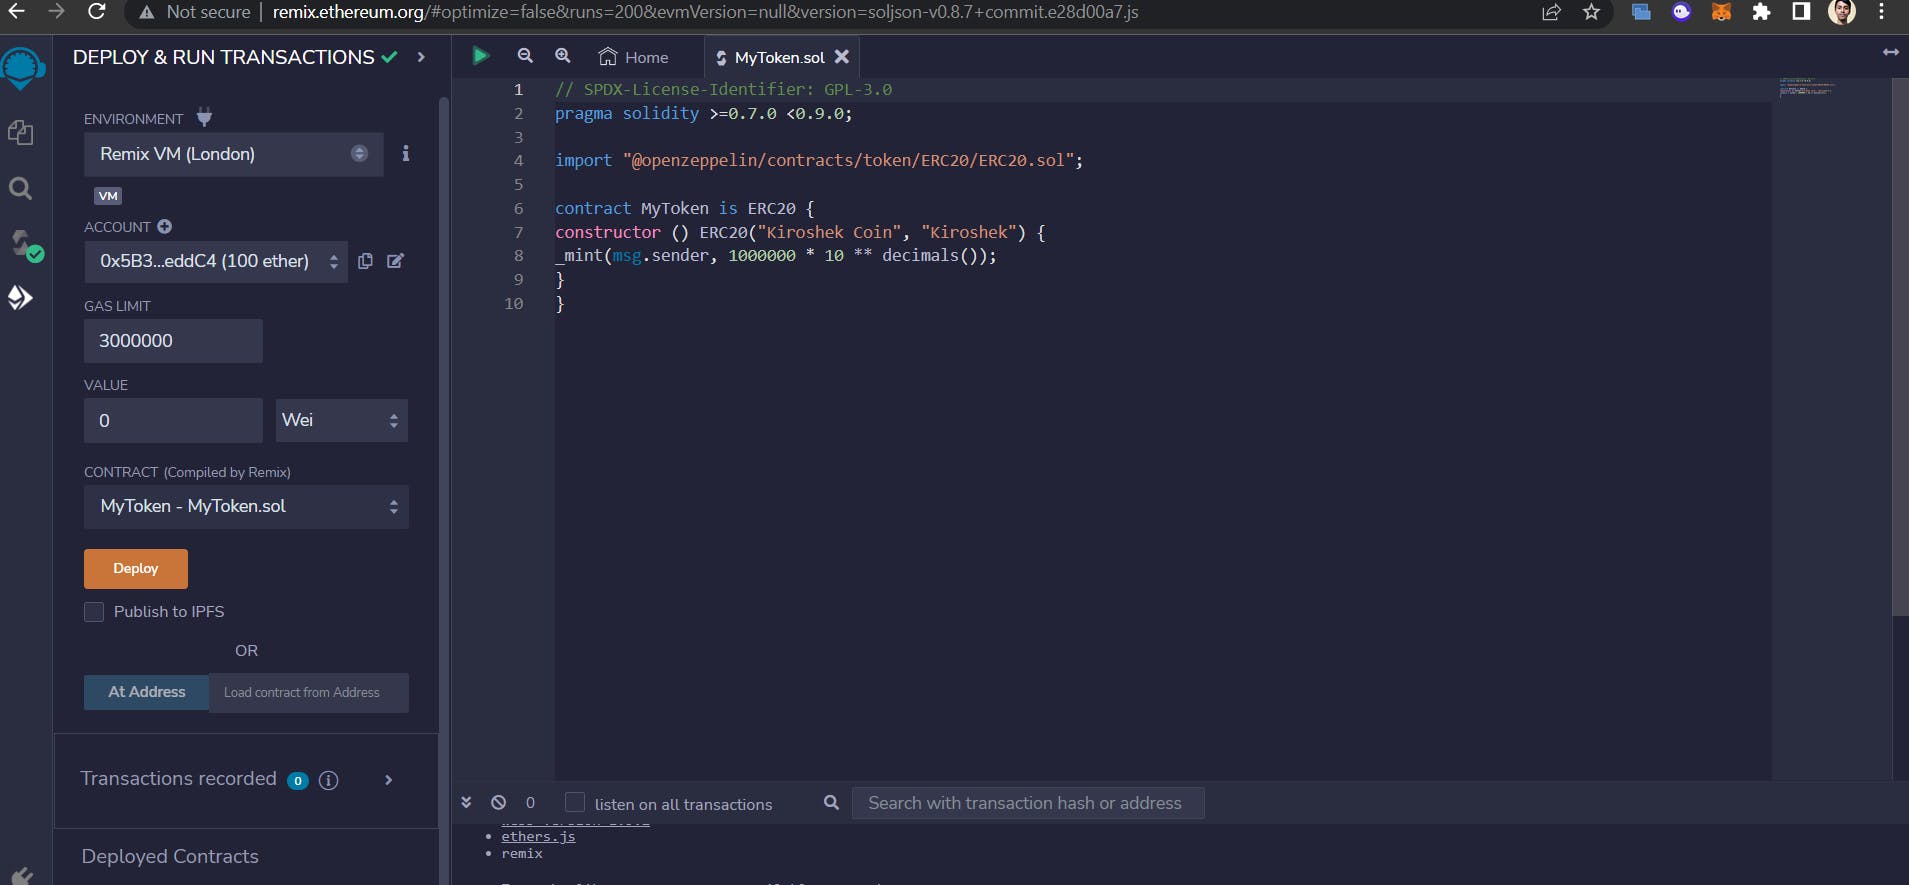
A popup will appear to connect your MetaMask wallet so just select the account in which you received your free ETH from the faucet
Click on deploy button to launch your token.🎉🎉🎉🎉
Now the token created it's time to check whether it is listed/deployed or not.
- Simply copy the smart contract address under deployed contracts section.
- Head over the Etherscan and paste your contract address and chek it is deployed or not.
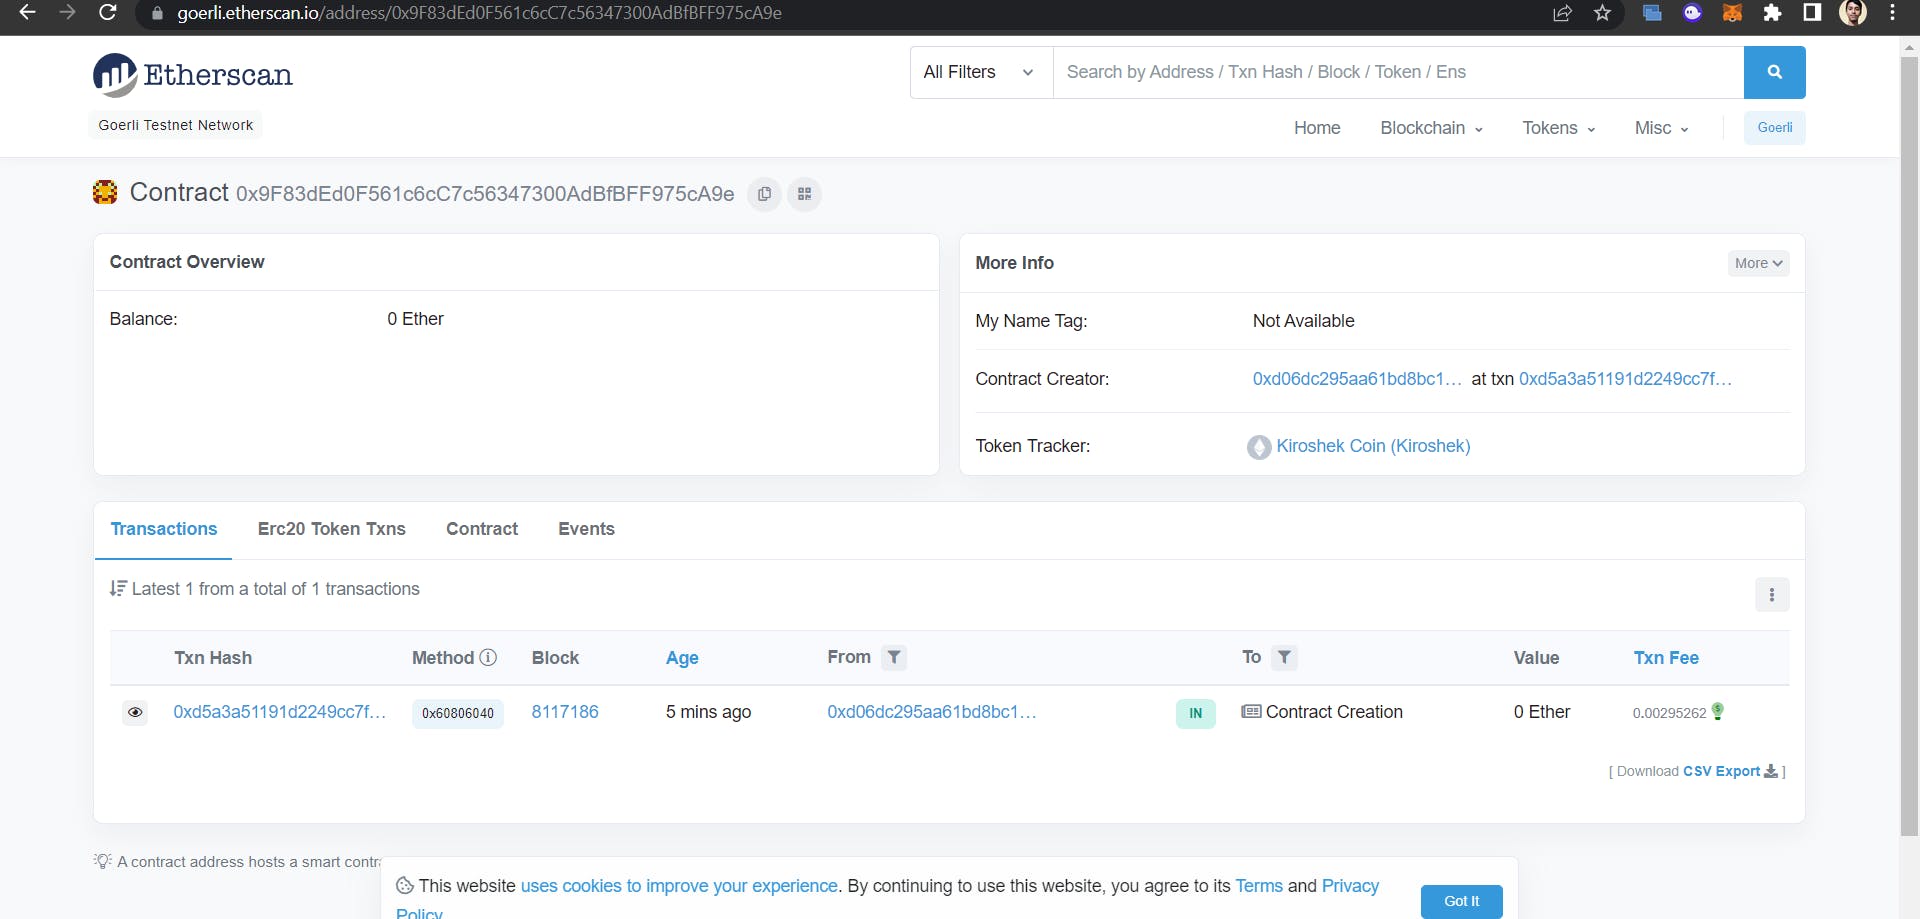
Yeaaaaaaaaaaaaaaaaaaah! our token successfully created.

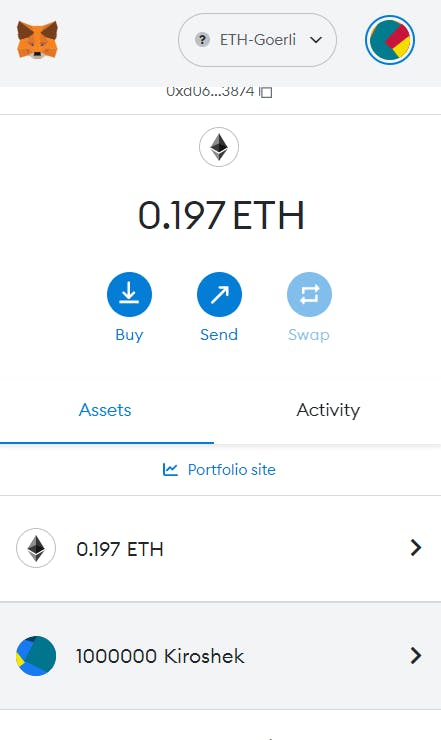
It is time to Import the token in to our Metamask wallet and see if we recieve 1000000 mint Kiroshek Coin.
Click on your MetaMask Wallet click on import token(listed below)

Enter your Token Contract address in the first section and whole thing is filled automaticly.
Now you will see your 1000000 tokens minted to your Ethereum Goerli address 😎
Conclusion
This is how we can easily create our own ethereum token 30-45 min.
The code we wrote is basic and is not ready to be deployed on the mainnet as we are still missing the SafeMath function and we don’t have any utility for the token as of now.
IN Next atricle i will guide how to write a smart contract from scartch with safemath func and tokeomics so it will have all functionality Buy and Sell Tax.

Let's connect over LinkedIn !
